
Waterproofing shower walls
Bathrooms are the most moisture-exposed areas in any home, and shower walls face the highest risk. Without proper waterproofing, water seeps through grout lines and tile joints, penetrating the substrate. Over time, this leads to mold growth, structural damage, and costly repairs.
For professional tile installers and contractors, waterproofing shower walls is not just an optional step, it is an essential part of every job. By choosing the right waterproofing system, such as membranes, foam boards and sealing accessories, installers can guarantee long-lasting, problem-free showers that meet industry standards and customer expectations.
Waterproof membrane for shower walls
Among the different systems available, waterproofing shower walls starts with a reliable membrane, which forms the foundation of any shower wall system. It prevents water infiltration behind the tile, protecting the structure from mold, rot and costly damage. Professionals often choose sheet membranes or foam waterproof boards like the water-stop board available at construction tool websites, which combines strength, light weight, and easy installation.
What Sets a Waterproofing Membrane Apart
A waterproofing membrane is a remarkably thin yet resilient sheet engineered for long-term protection. The Water-Stop membrane from Guru features a four-layer design engineered for maximum durability and reliability while waterproofing shower walls. The structure consists of:
-
Outer layers (x2): non-woven fabric made of 50% polyester and 50% polypropylene, providing excellent adhesion to tile adhesive and mechanical protection.
-
Core layers (x2): Double EVAC impermeable layers, which ensures full waterproofing and the ability to bridge minor cracks.
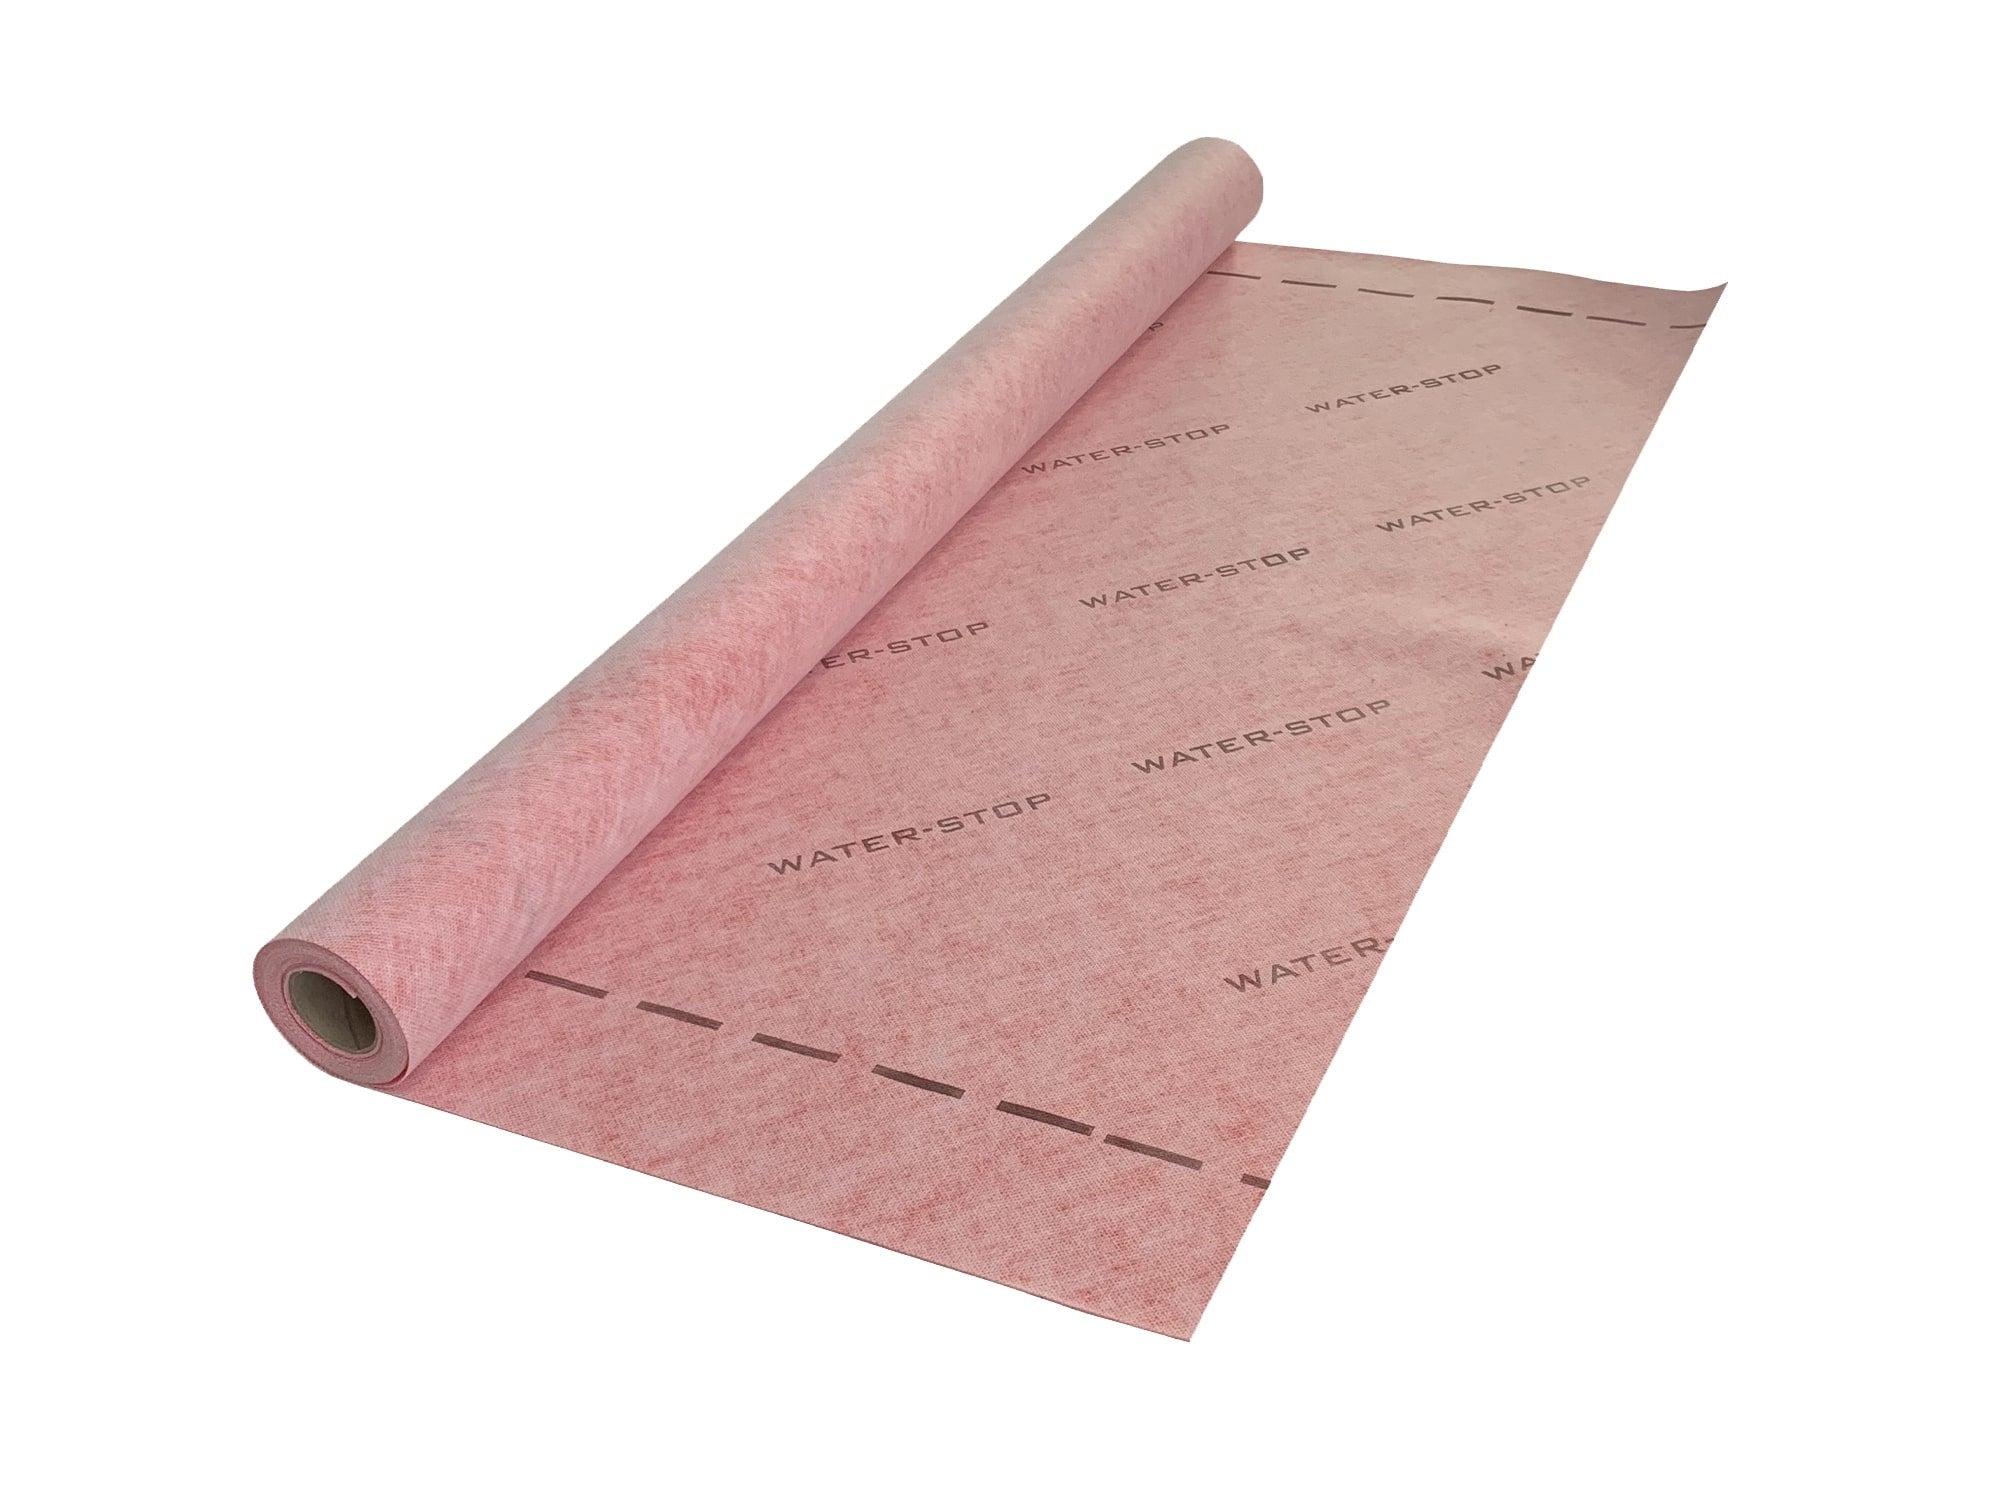
Despite being lightweight and less than 1mm thick, it delivers impressive mechanical strength, including high tensile resistance to bridge minor cracks - making it well-suited for both wall and floor applications. Additionally, it allows vapor to pass through (vapor diffusion), helping to prevent moisture buildup behind finishes.
Sealing shower walls
Even the best waterproof material will fail if seams and joints are not properly sealed. Using dedicated sealant systems, waterproof tapes and pipe collars ensures that vulnerable points such as corners, niches and penetrations remain watertight.
Waterproofing shower walls for tile
While ceramic tiles are durable and water-resistant on the surface, they are not waterproof. Water can seep through grout lines, seams and edges, reaching the substrate underneath. By installing a dedicated waterproof membrane, professionals create a barrier that protects both walls and floors.
This ensures that tiles remain secure and dry, while also preventing moisture from compromising the shower's structural integrity. Proper waterproofing shower walls for tile is therefore not just recommended, it is a fundamental step in any professional tile installation, specially for wet areas.
Waterproofing shower walls and floor: Step by Step with Water-Stop
1. Prepare the Substrate
-
Ensure walls and floor are clean, dry, and free of dust, grease, or debris.
-
Check that surfaces are flat and level; fill cracks or holes with cementitious filler.
-
Install the foam waterproof board (if using) or cement board as a base. Note: Water-Stop can be applied over both.
2. Cut and Fit the Membrane
-
Measure walls and floor, then cut Water-Stop sheets to size.
-
Plan overlaps: seams should typically overlap 5–10 cm for a continuous barrier.
-
Dry-fit sheets before adhesion.
3. Apply the Membrane to Walls and Floor
-
Walls first: Apply a thin layer of recommended adhesive (or thin-set if specified).
-
Press the Water-Stop sheet firmly onto the wall. Smooth out air bubbles.
-
Floor membrane: Apply continuously, extending the wall membrane down to the floor to form a single continuous barrier.
Key: Ensure all seams overlap properly and that the membrane extends at least a few centimeters beyond corners and floor junctions.
4. Seal Corners, Transitions, and Penetrations
-
Corners (inside and outside): Apply pre-formed corner pieces or flexible waterproof tape over the overlapped membrane.
-
Wall-to-floor junctions: Seal with corner pieces or tape, ensuring a continuous barrier from wall to floor.
-
Pipe penetrations: Use pipe collars or flexible gaskets to tightly seal around showerheads, taps, and drains.
This step comes after the main sheets are in place, to integrate corners and vulnerable points into the continuous membrane.
5. Check Overlaps and Adhesion
-
Inspect all seams, corners, and transitions.
-
Press and reinforce with additional tape or adhesive if necessary.
-
Make sure the membrane is smooth, without gaps or bubbles.
6. Drain Integration
-
Install a waterproof drain flange or collar, connecting it to the floor membrane.
-
Seal carefully with adhesive or gasket as recommended by the manufacturer.
-
Ensure proper slope (1–2%) toward the drain to avoid standing water.
7. Optional Flood Test
-
Temporarily seal the drain.
-
Fill the floor with water (2–3 cm) and leave for 24 hours.
-
Inspect walls and floor for leaks or damp spots.
-
Correct any issues before tiling.
8. Tile Installation
Once waterproofing is verified:
-
Apply thin-set directly over the Water-Stop membrane.
-
Tile walls and floor, maintaining grout lines.
-
Optional: apply grout sealer for extra protection.
Check the mistakes to avoid when waterproofing a bathroom
Best waterproof material for shower walls
Sheet membranes and foam waterproof boards like Water-Stop are considered the top-performing solutions for waterproofing shower walls, since they provide complete waterproofing right from the start.
Other waterproof material for shower walls and floors
While individual waterproof membranes provide a reliable barrier behind tiles, many professionals and DIY enthusiasts are now turning to complete waterproof shower systems. These are an all-in-one solution that includes everything needed to create a fully waterproof, ready-to-tile shower. These systems combine:
-
Waterproof membranes
-
Integrated drains and connectors
-
Sealing accessories for corners & joints

Other additional solutions for waterproofing shower walls are:
-
Foam waterproof boards for showers and bathrooms: Products like the Guru Water-Stop Board act as both a structural underlayment and a waterproof barrier. These foam boards are lightweight, easy to cut, and provide a continuous layer of protection behind tiles.

Check this article:
https://www.placeforpros.com/blogs/our-blog/the-essential-guide-to-water-stop-boards
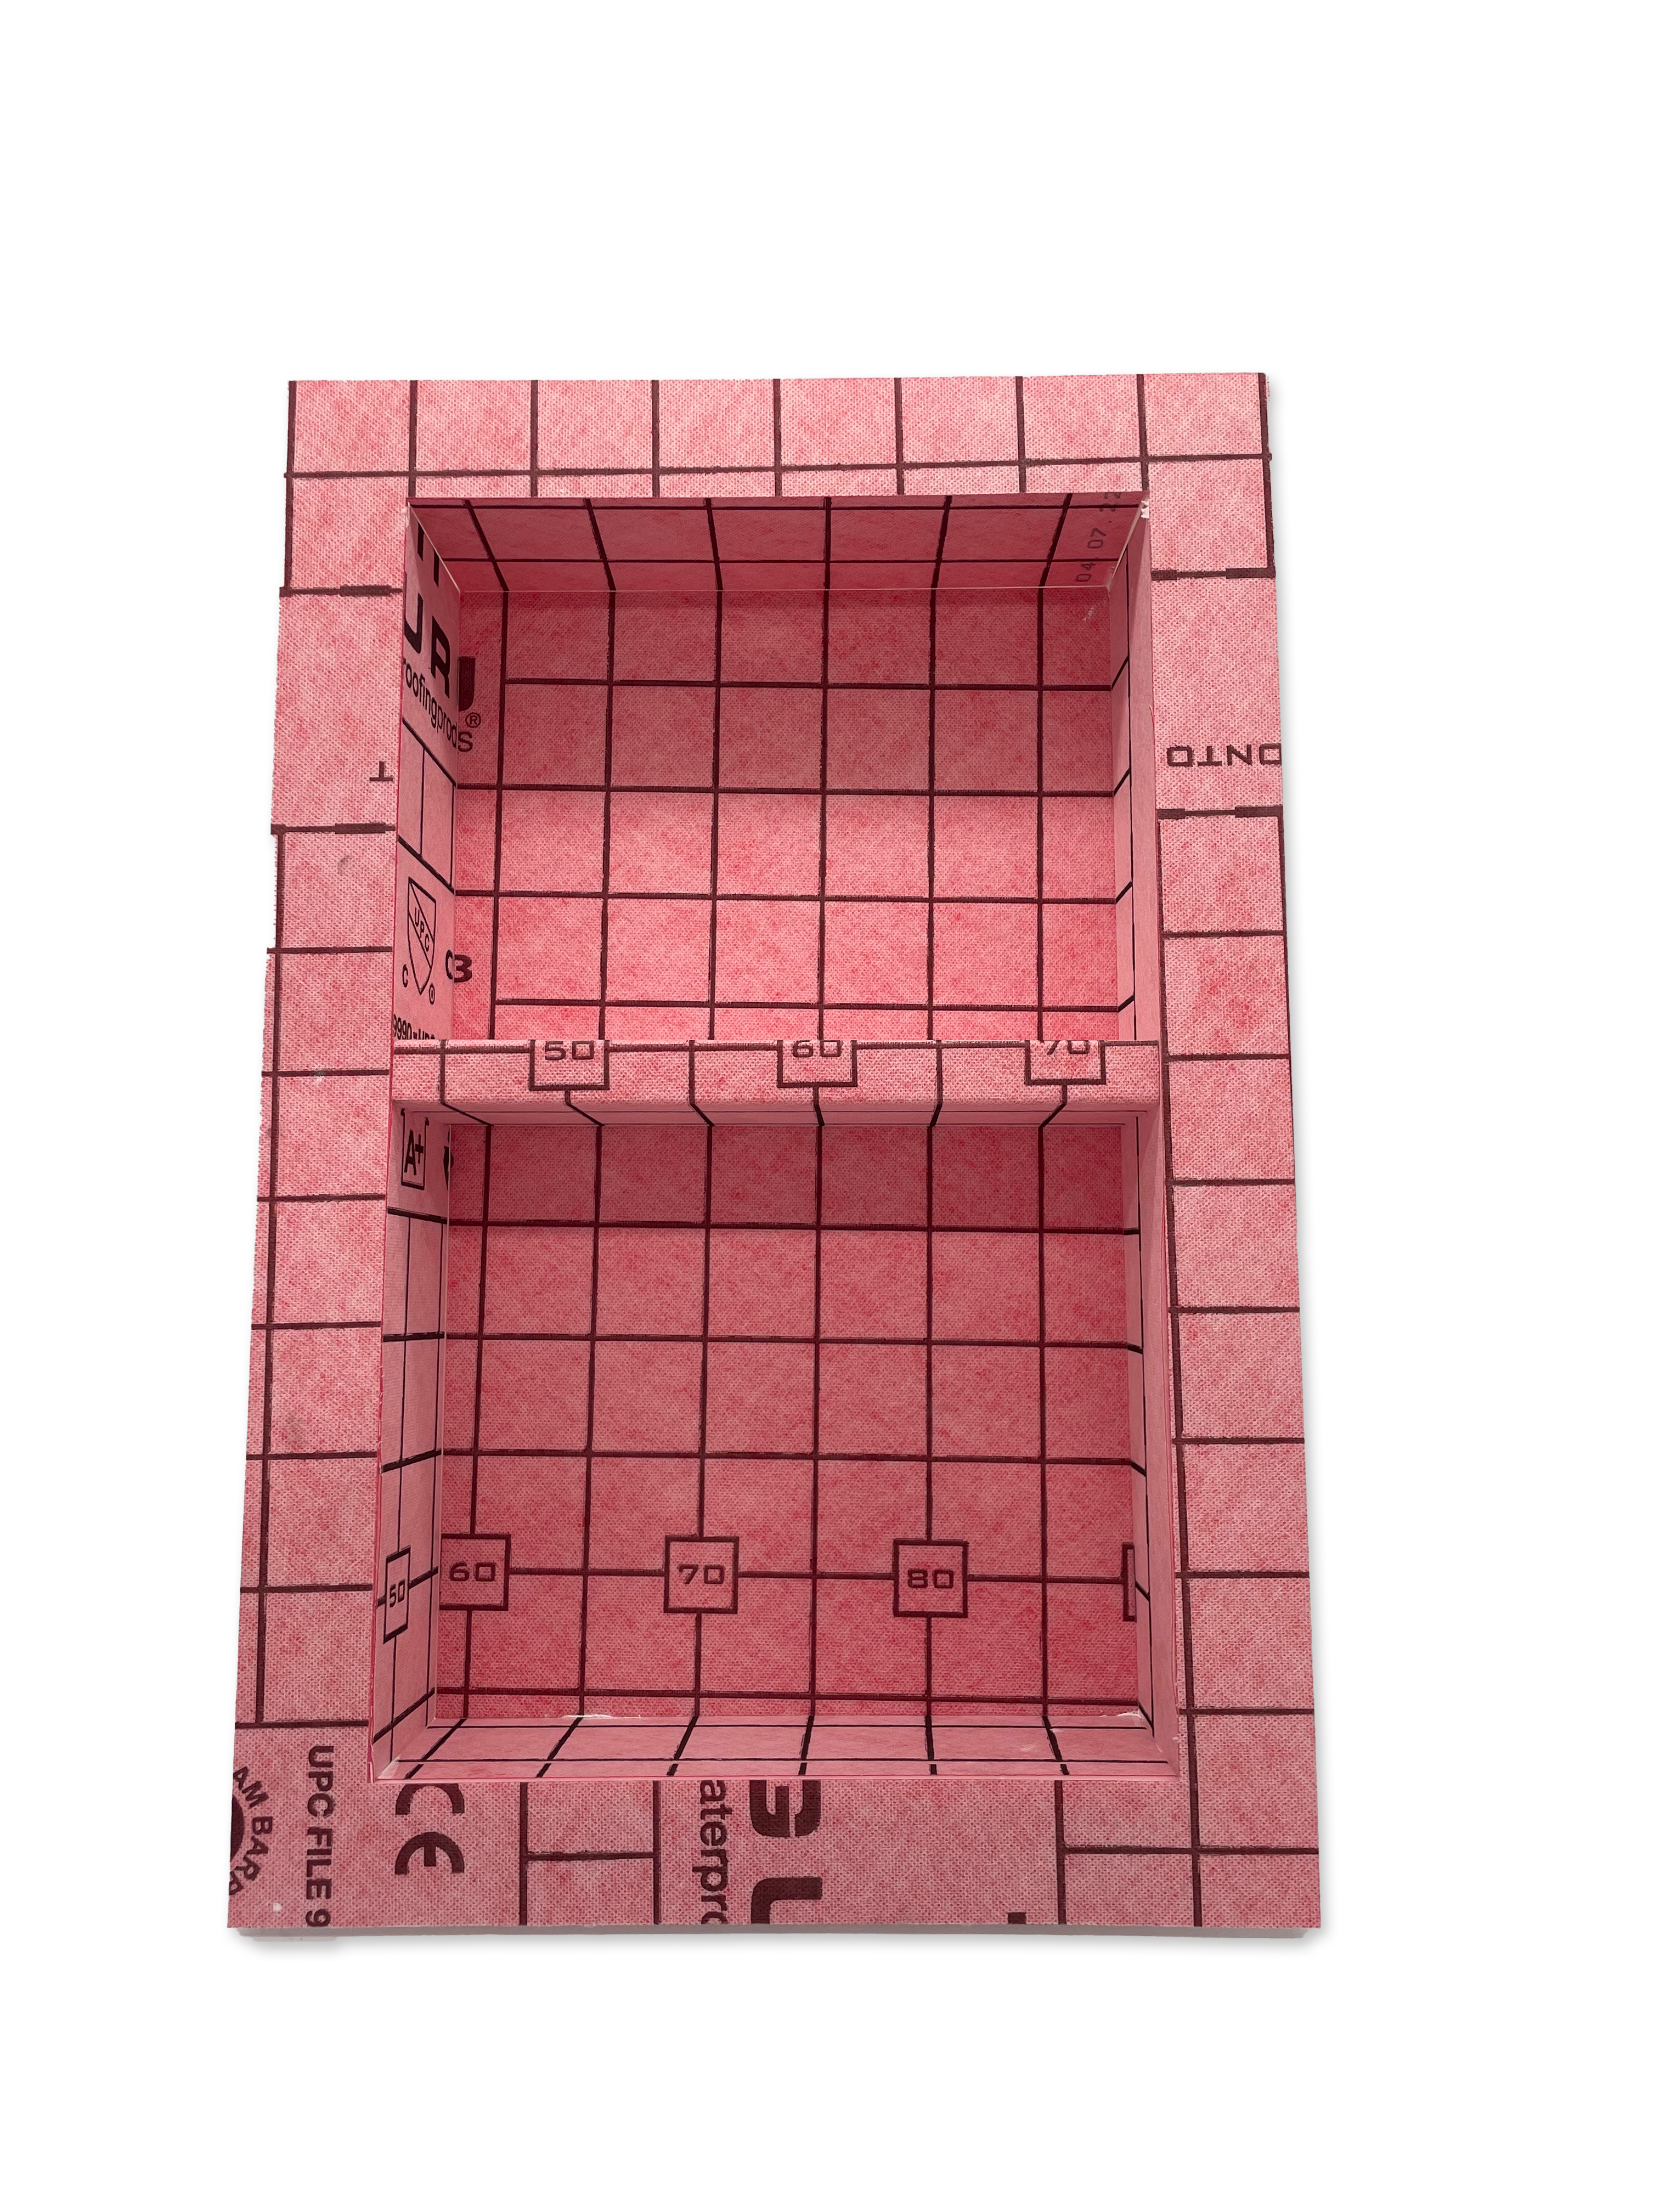
-
Pre-formed waterproof niches and shelves for showers & bathrooms: Integrated niches, such as the Guru W-S Niche, are designed to fit seamlessly into waterproofed walls. They allow for functional storage without compromising the integrity of the waterproof barrier.
Conclusion
Waterproofing shower walls is essential for any bathroom project. Whether you are renovating or building a new shower, investing time and care in waterproofing will save you from costly repairs in the future.
Explore more professional tips and waterproofing solutions for showers and bathrooms on our construction tool website, including other related articles:
https://www.placeforpros.com/blogs/our-blog/what-is-an-uncoupling-membrane
And create your free account to gain access to expert resources, installation guides and the latest product updates or take it a step further by joining our Contractors program, where you’ll benefit from exclusive purchasing perks, early access to new products, and direct support for our team of experts.